Roof editor overview
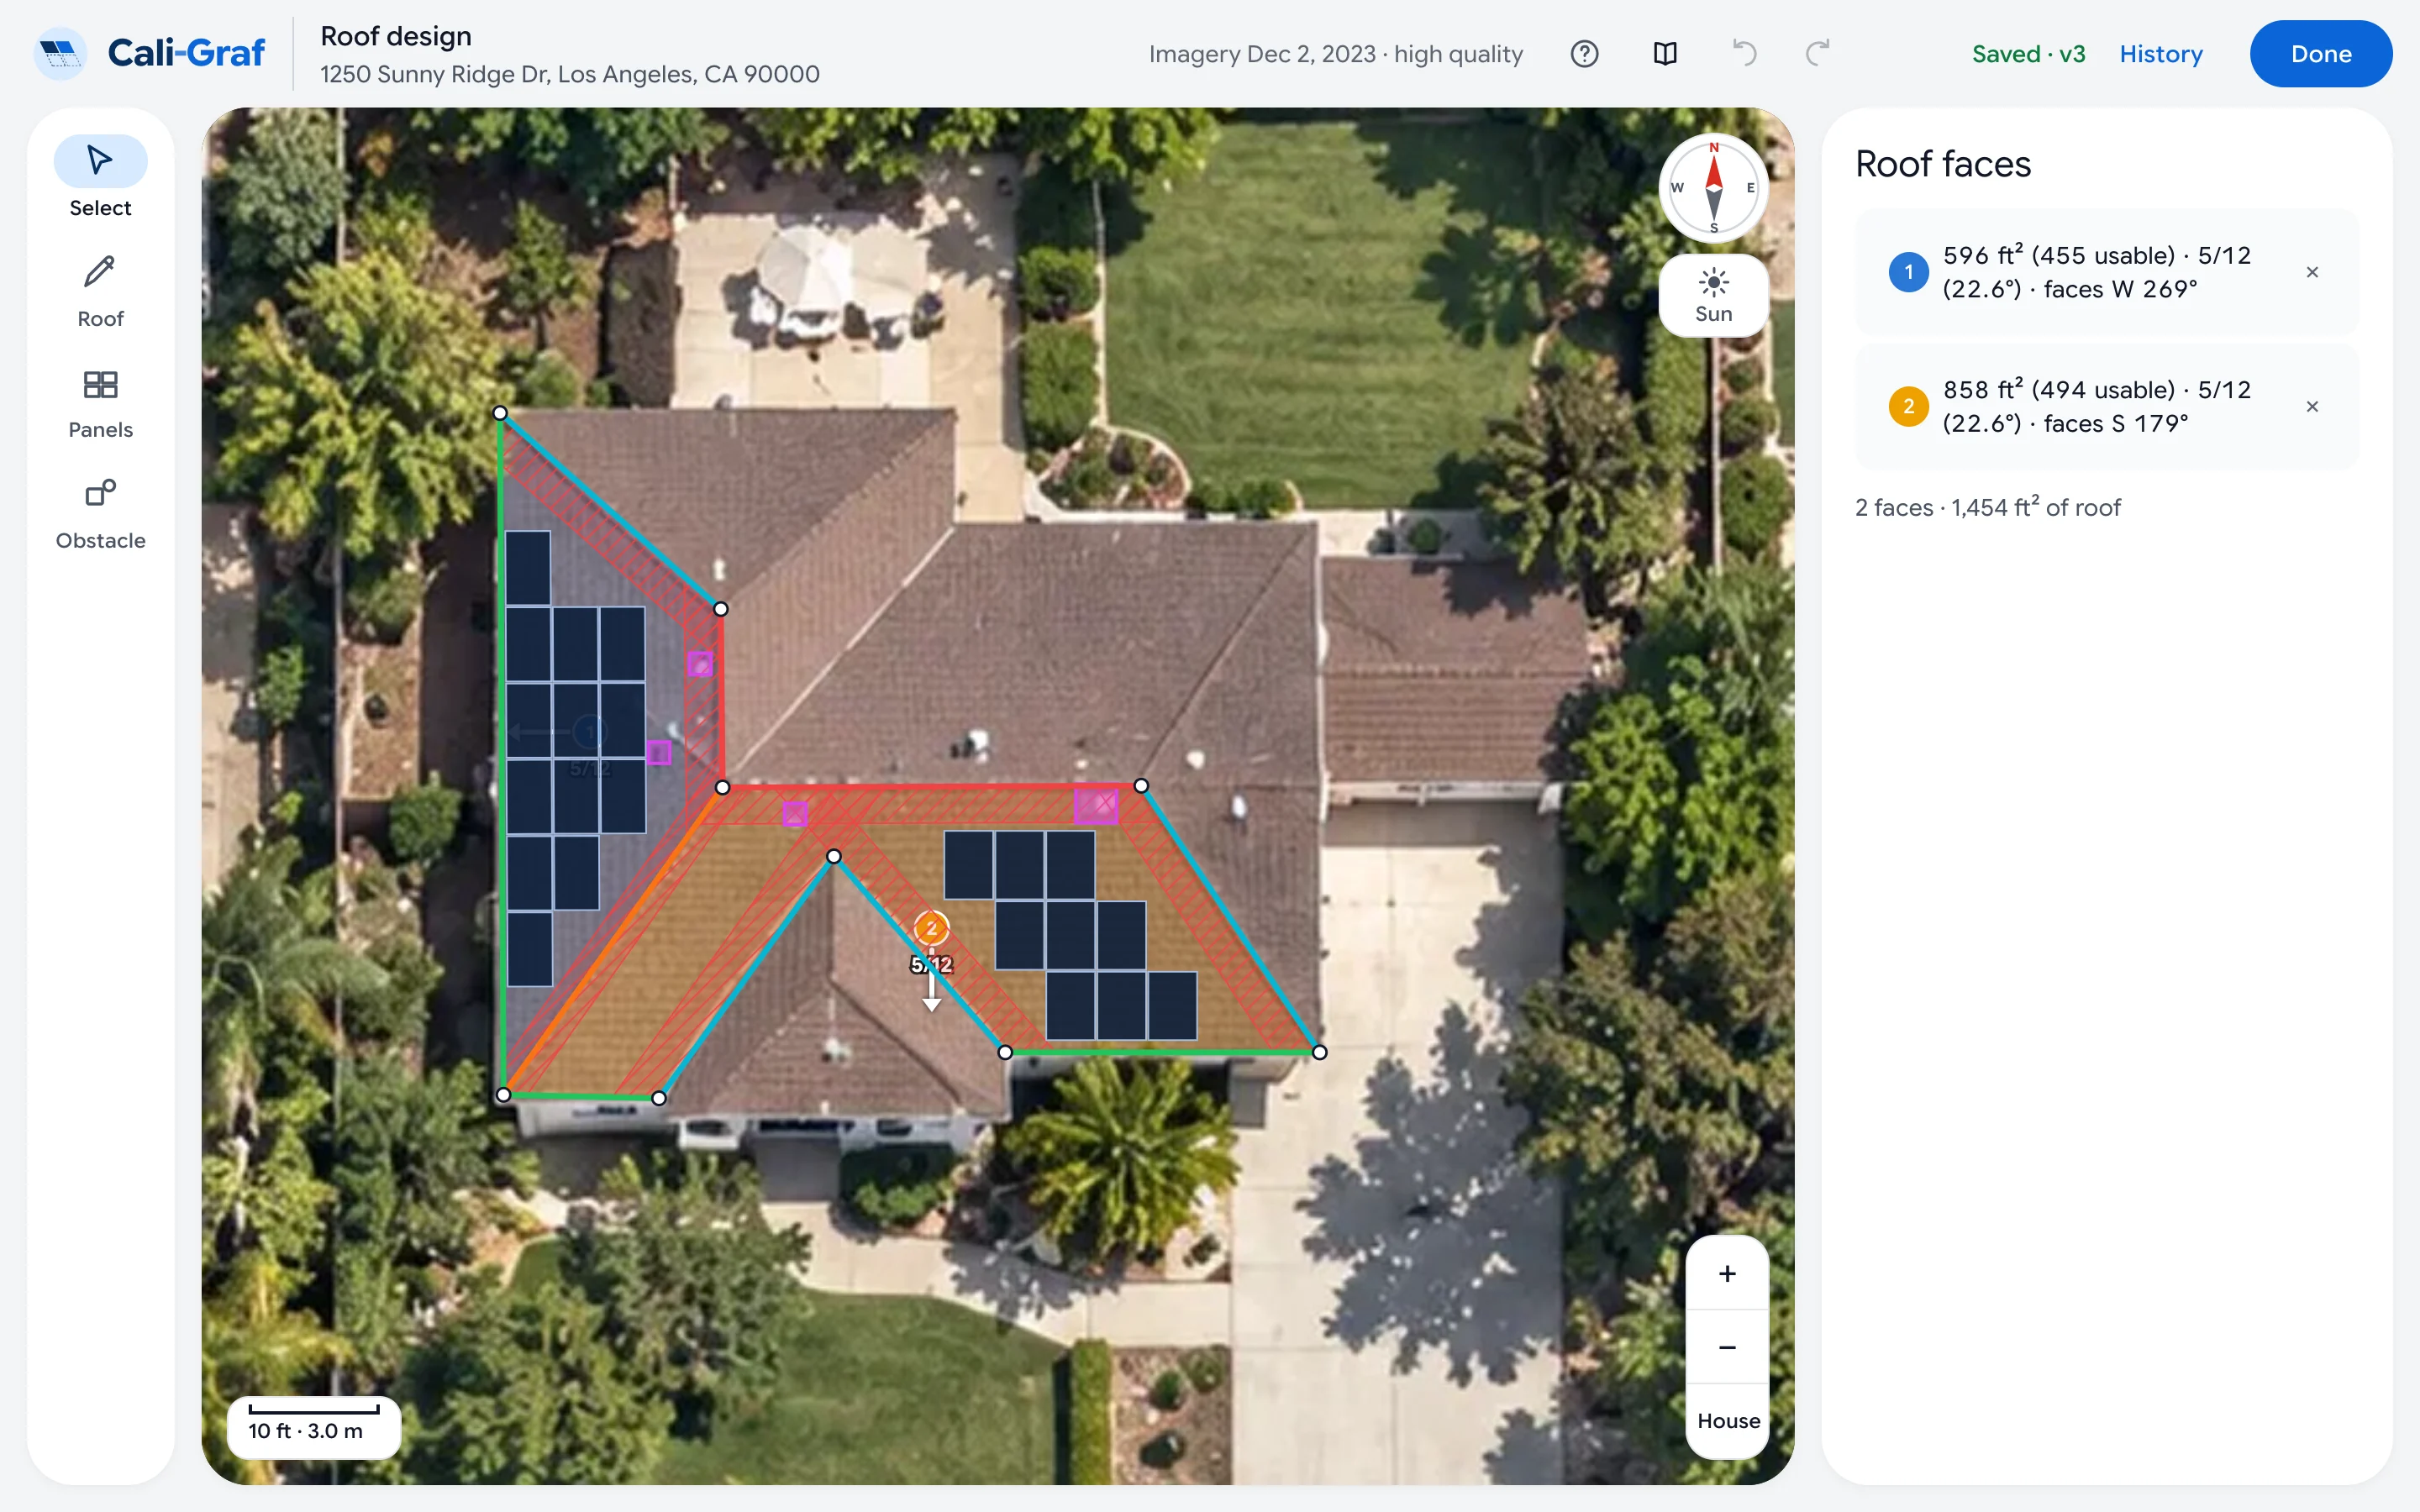
The roof editor is where you trace the roof on Google’s aerial image and place the panels. Tools are on the left, the selected face, edge or panel is on the right, and the editor saves every change on its own.
Open the editor from the calculator with Design roof ↗ — or Edit design ↗ once a design exists. It opens in a new tab; Done takes you back to the calculator.
Top bar
The address and the date and quality of the aerial image; the question mark, which starts the tour, and the book icon, which opens this help in a new tab; Undo and Redo; the save status, like Saved · v…; History with saved versions; and Done.
Tools on the left
| Tool | What it does |
|---|---|
| Select | Select a face, an edge, an obstacle or panels; drag corners to reshape a face. Shortcut S. |
| Roof | Trace roof faces corner by corner, or split a face with a line. Shortcut P. |
| Panels | Choose the panel, fill the roof, add, move and turn panels. Shortcut N. |
| Obstacle | Draw chimneys, vents and skylights, or find them from Google heights. Shortcuts O, U, Y. |
The panel on the right
It follows the tool. Select lists the roof faces with their area, pitch and direction. Roof adds Roof edges. Panels shows the panel and the fill buttons, then Fire setbacks and Fire pathways. Obstacle shows the shapes and Detect obstacles. Select something and its settings appear on top: a face’s pitch, direction and sun, an edge’s type, an obstacle’s shape, the selected panels’ angle.
On the image
Drag empty space to move the map, scroll or pinch to zoom. In the corners: the compass, Sun for the sun map, the scale, zoom buttons and House, which centers the view on the home again.
Saving
Every change saves to the calculation on its own, and the calculator picks up the new roof. See How your work is saved. On a phone the tools move into a menu — see Use Cali-Graf on a phone or tablet.
Was this helpful?
Thanks — it helps us make this page better.
Updated